Swagger
Swagger is used to expose all available APIs through a simple browser interface. This is useful to gather an overview of implemented functionality or quickly test a feature for which no other UI was built yet.
Swagger is available at https://demowallet.trimplement.com/api/swagger-ui
The available APIs are grouped into four categories and can be selected through the dropdown menu in the Swagger navigation bar:
Name |
Description |
default |
Lists public APIs added in DemoWallet. |
demowallet-admin-v2 |
Lists administrator APIs added in DemoWallet. |
v2corewallet |
Lists all public CoreWallet APIs. |
v2corewallet-admin |
Lists all administrator CoreWallet APIs. |
💡 |
Once you have familiarized yourself with the DemoWallet, you can compare the DemoWallet-specific APIs to those available out of the box in CoreWallet to get a better feeling for where product-level enhancements needed to be made. |
💡 |
To learn more about how APIs are designed in CoreWallet, please refer to the Controllers chapter in the CoreWallet documentation. |
Most APIs require an authenticated user. It is therefore useful to create a user first, which can be done through the standard CoreWallet “Create Wallet” API call. Select the group “v2corewallet” from the dropdown, then browse for the call POST /v2/wallet/wallets:register in the wallet-controller.
Not all of the payload parameters are required, you can try with the following minimum JSON request body:
{
  "acceptedTermsAndConditionsId": "2-3",
  "countryCode": "DE",
  "emailAddress": "your@email.com",
  "language": "EN",
  "password": "yourpassword"
}
This is the minimum set of parameters required in order to register a new wallet and user in the system.
💡 |
You can see how CoreWallet reacts to validation and parameter errors by 1. leaving out required fields or 2. providing unsupported values; e.g. try to change |
The response JSON contains an authentication block which contains the necessary details to send subsequent API calls with the newly created user’s authentication:
{
  "apiVersion": "2.0",
  "data": {
    "walletId": "AAEAAAMnDPp42I0I1bgxIRDH",
    ...
    "authentication": {
      "tokenId": "AAEAAAgcawqZyfVCJv******",
      "tokenSecret": "df5585655713d335d672bcd027******",
      "apiKey": "JcCy3R4Q4Hv8S8JAfeNj83mvRugJ2SBTYMvf9mFsAMgWRmBKzC******",
      "walletId": "AAEAAAMnDPp42I0I1bgxIRDH",
      "roles": [
        "CONSUMER"
      ],
      "oneTimePasswordRememberMeValue": null,
      "oauth2AccessToken": null
    }
  }
}
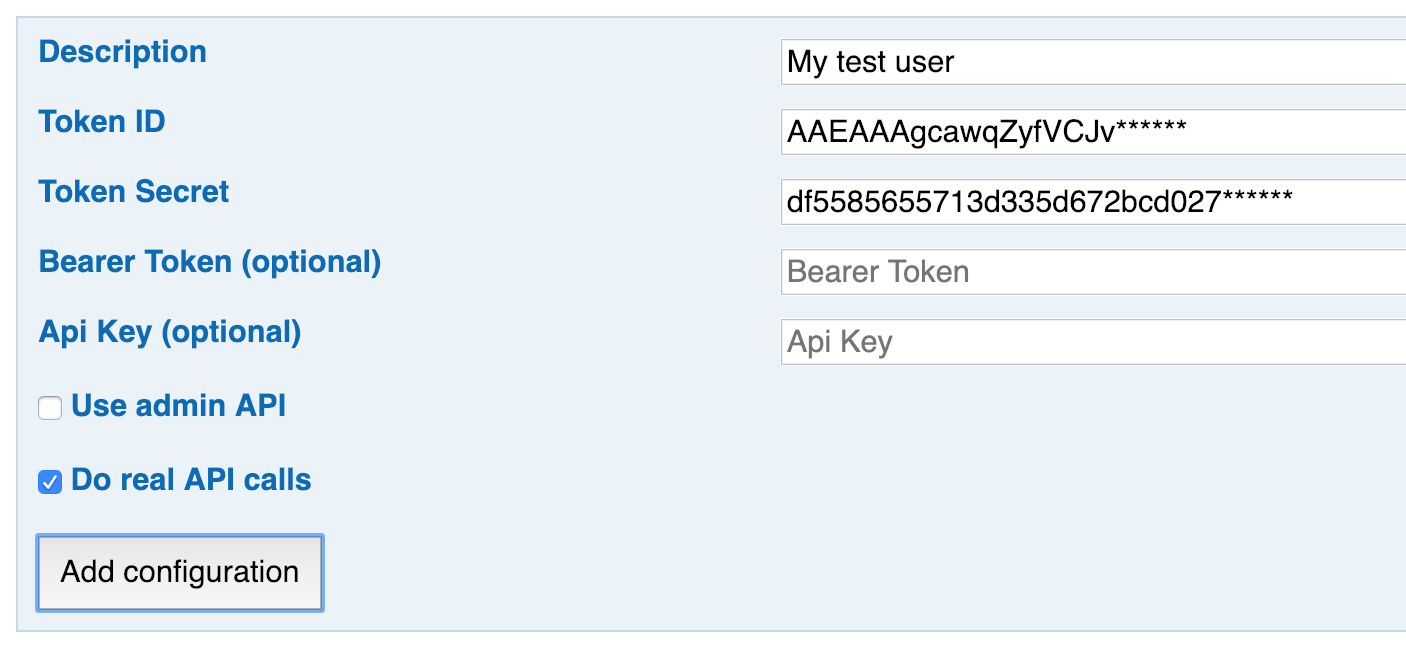
Copy this block e.g. into a text editor, then click on the “Configuration” link in the navigation bar. You can store your credentials here and easily reuse them for further tests.
Copy the tokenId and tokenSecret values into the corresponding fields, provide a description, and click on “Add configuration”.
After adding the configuration, you can switch back to the API by clicking on the API button in the navigation bar. The newly created configuration is automatically activated.
You can now make subsequent calls using this authentication. Select the group “v2corewallet” again and browse to the GET /v2/wallet/wallets/{walletId} call in the wallet controller. As the request parameter “walletId”, enter the value from the registration response above, then submit the request.
You will see that the response contains nearly the same information as the registration request. Only the authentication data is missing, this is only provided in the registration and login calls.
With the authentication active, you can browse through other API calls and try them out. For example, you can also get the user details using the GET /v2/user/users/{userId} call from the user controller, or store an address for this user with the POST /v2/user/users/{userId}/addresses call.